手机浏览 RSS 2.0 订阅 膘叔的简单人生 , 腾讯云RDS购买 | 超便宜的Vultr , 注册 | 登陆
浏览模式: 标准 | 列表2017年02月的文章

PhpStorm中因为JS版本低而提示错误的解决

开发项目的时候,发现:

大小: 33.33 K
尺寸: 500 x 179
浏览: 2798 次
点击打开新窗口浏览全图

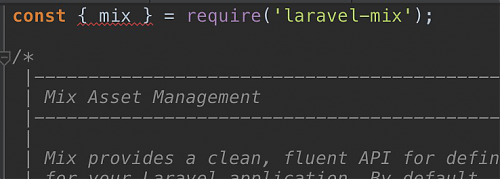
这是提示我,当前Javascript版本不支持

打开phpstorm的设置,进行语言和框架设置,选中Javascript,将版本设置为ECMAScript6。

大小: 47.99 K
尺寸: 500 x 113
浏览: 2052 次
点击打开新窗口浏览全图
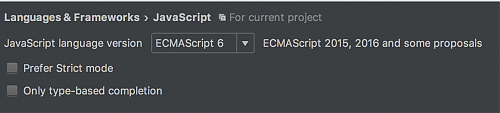
保存一下,再看刚才的文件,提示已经没有了
大小: 49.97 K
尺寸: 500 x 194
浏览: 1999 次
点击打开新窗口浏览全图
 
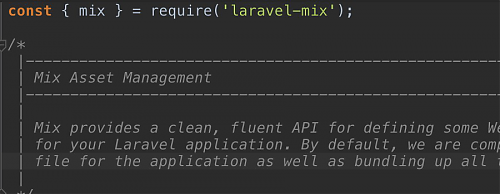
由于以前只是用JS写写常用的东西,也没有注意过。果然使用ECMAScript6。虽然 VSCode什么的也可以,但切换来切换去的,总觉得不方便,而且这个设置只对当前项目有用,就先这么处理吧

Tags: phpstorm

Laravel action helper函数用法

原本以为是很简单的一个用法。

action('XxxxController@test',['abc'=>1]);
结果,不仅仅是这样的,
 
如果你的XxxxController@test,没有在router里定义过。会直接报错,报:App\Http\Controller\XxxController@test 不存在,虽然 你很明确的知道它就在那里!
 
原来我 写URL的时候都是直接写 url('abc/def'),其实应该用action('xxxcontroller@def'),好处是,action是可以带参数的。url你永远带不进参数!!!
 
纯记录。NND

Lumen启动时出现:NotFoundHttpException

Lumen在初次安装好启动的时候,访问会出现:NotFoundHttpException

找了一下原因,在stackoverflow上有很多人提出来。常见的有这两种:在public/index.php里修改最后的$app->run();

  1. $app->run($app->make('request'));
  2. $app->run(Illuminate\Http\Request::capture());
如果用第1种,那你会发现所有的路由都被"/"解析了。你随便在URL里输入啥,都只会进入$app->get("/")这个路由
只有第二种才是正确的。
 
记录一下,参考 :
1、http://stackoverflow.com/questions/29728973/notfoundhttpexception-with-lumen
2、http://stackoverflow.com/questions/36436967/just-installed-lumen-and-got-notfoundhttpexception
 

Tags: lumen

买了台阿里云的内网(二)

 接上一篇:买了台阿里云的内网 的内容

上一篇中,我采用了nginx来转发http代理 的请求,但这里有个问题就是,如果你要请求的是https的数据,上面的配置就不方便了
 
于是祭出了ssh -D 大法,在内网里使用ssh -D xxxx 公网IP 。然后使用polipo来设置成http_proxy和https_proxy代理 
 
polipo安装很简单:apt-get install polipo
修改/etc/polipo/config,加入两行
 
socksParentProxy = localhost:上面的xxx
socksProxyType = socks5
 
再将~/.bashrc中的http_proxy改为 http_proxy=127.0.0.1:8123 (8123是polipo的默认端口),再加一条https_proxy,数据一样
 
只是ssh -D ,会连接上远程服务器,有点麻烦。总不能不关窗口吧?再祭出screen。于是都解决了
screen -S sshd
然后ctrl+a d 退出来就OK了
 
再试着请求wget https://getcomposer.org/installer,顺利下载并安装好
 
----EOF---
后记:如果你不请求https数据,那么用nginx就够了。
 

买了台阿里云的内网

几个小笔记,自己处理一下

10.171.x.x 是外网机器 的内网IP
10.29.x.x 是内网机器 的IP
 
#在外网机器上加入这些iptables
iptables -t nat --flush
iptables -t nat -A PREROUTING -p tcp --dport 2222 -j DNAT --to-destination 10.29.x.x:22
iptables -t nat -A POSTROUTING -d 10.29.x.x -p tcp --dport 22 -j SNAT --to 10.171.x.x
iptables-save > /etc/iptables.up.rules
echo "pre-up iptables-restore < /etc/iptables.up.rules" > /etc/network/interface
--------上面这段是支持直接用2222端口连接入内网
 
在外网机器 的nginx加入以下配置,设置HTTP代理 
server {
    listen       9999 ;
    #charset koi8-r;
    #access_log  logs/host.access.log  main;
   location / {
       resolver 114.114.114.114;
       proxy_pass http://$http_host$request_uri;
    }
}
 
----------
在内网机器里加入:
export LC_ALL=en_US.UTF-8
export LANG=en_US.UTF-8
export LANGUAGE=en_US.UTF-8
export http_proxy=http://10.171.212.249:9999


修改:/etc/apt/source.list 为 ustc.edut.cn的源
 
deb http://mirrors.ustc.edu.cn/debian stable main contrib non-free
# deb-src http://mirrors.ustc.edu.cn/debian stable main contrib non-free
deb http://mirrors.ustc.edu.cn/debian stable-updates main contrib non-free
# deb-src http://mirrors.ustc.edu.cn/debian stable-updates main contrib non-free
 
# deb http://mirrors.ustc.edu.cn/debian stable-proposed-updates main contrib non-free
# deb-src http://mirrors.ustc.edu.cn/debian stable-proposed-updates main contrib non-free
deb http://mirrors.ustc.edu.cn/dotdeb jessie all
deb-src http://mirrors.ustc.edu.cn/dotdeb jessie all
 
------------
添加了dotdeb的源后,需要处理一下(官网是https,其实也支持http)
wget http://www.dotdeb.org/dotdeb.gpg
cat dotdeb.gpg | apt-key add -
 
--------
至此,全部完成。由于有http_proxy,现在curl/wget,默认都可以用代理 了。只是https的不行。先这样了


Tags: http_proxy